
One of the most important tools a pyrographer (or any artist really) needs is the ability to create patterns.
It Starts with a Pattern
When I create a piece I start with an idea or inspiration. Do I have a theme, or pattern, already in mind? Am I searching for the “perfect” canvas, be it wood, canvas, watercolor paper, or leather? Am I starting with the wood and choosing a pattern from there?
Once I have an idea of what I want to do, I start working on the pattern. I may create it myself using Procreate or Canva, or, If I have a piece of premade art licensed for use I may use that instead. Regardless, the one thing I always need is a stencil to transfer onto the wood. My personal preference is to heat transfer the pattern which I do using my laser printer.
Creating a Stencil
My choice for creating stencils is the application Rapid Resizer. One great thing about this software is that it is web-based therefore it doesn’t need to be downloaded and take up space on your device. I use this site on my computer and tablet (not so much my phone. Even my extra-large phone screen is too small for me). Using it on the iPad is very convenient as using the pencil to clean up stencils is much easier than with the mouse. Without going into too much detail I’m going to give an overview of the tools I use the most.
Note: I am NOT a paid affiliate with the site, this is simply my opinion.
Rapid Resizer offers different tiers of service with the free version being easily accessible but not very versatile. You can see the subscriptions offered below.
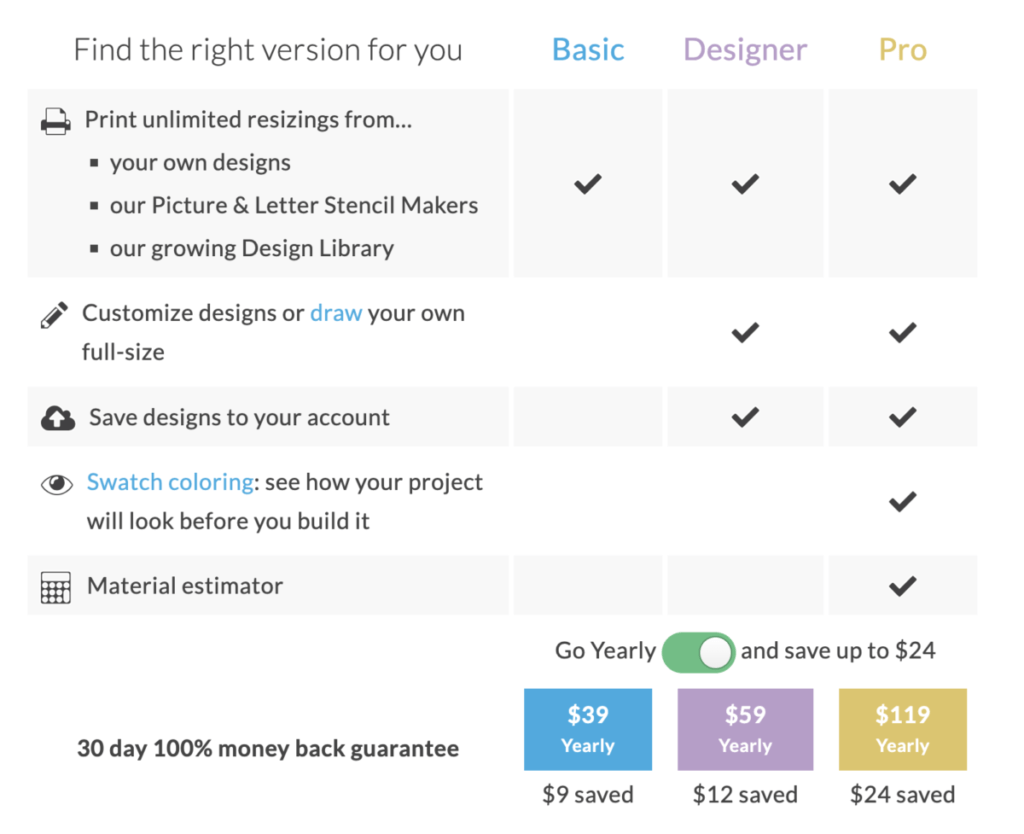
I’ll admit, it’s pricey, but what I’ve learned is that your time is valuable. It’s worth it to spend the money to get the tools to help you do your best work in the time efficient way possible. The price is absolutely worth it for me as I use on almost every project to stencil a pattern onto the wood.
This is the Home Screen once you have logged in. (I am a Pro subscriber so this is my screen. Your’s may look different depending on the tier you subscribed to.)

As you can see some of the options are:
Use a design
- Load a design to resize: you can upload a design to resize (colored or black and white)
- Saved Designs: you can load a design you have saved previously in the app
- Design Library: Rapid Resizer offers over 500 designs in their library
Create a Design
- Letter Stencil Maker: you can use any of the 200+ fonts and shapes to create words for your pattern. This is useful if you want to do a sign for example
- Picture Stencil Maker: This is the tool I use the most. I will cover this in detail
- Designer: You can create your own design from scratch using their designer software
Help
- Manage Account: you can change your subscription (or subscribe) here. You manage payment methods here too
- Get Started: This is a basic site run-through to get you acquainted with the site
- Answers: FAQ’s are here
- Rapid Resizer Academy: this is free and 1.5 hours long
- User Manual: this is the detailed manual on how to use Rapid Resizer. It is long but detailed
Picture Stencil Maker
So, to create a stencil from a design, you click on Picture Stencil Maker (under “create a design”).
It will bring you to this page:
From here you can click on “Select an image from your device”. This will open up a dialog window from which you can select a file from your computer to upload. We’ll be looking at one of my original pieces with a colored background for this demo. I felt this design works well to demonstrate out how the stencil creation works.
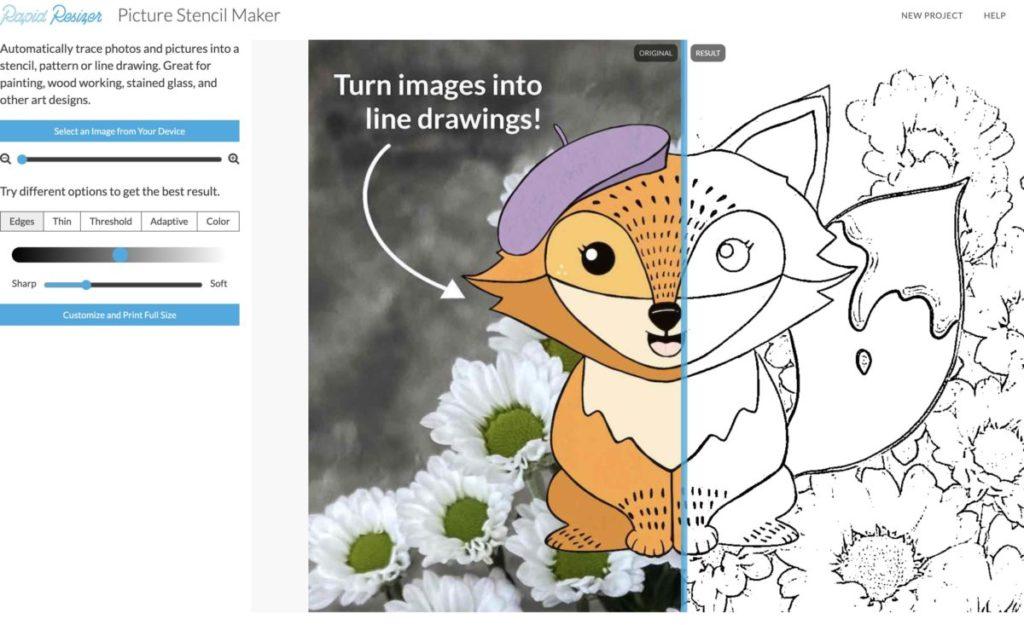
Your screen will resemble the image below:

The blue bar acts as a preview of the stencil. Essentially what it does is remove the colors and leaves behind just the outline. You do have different options that you can experiment with to create the stencil you want, these options are on the left side of the above screen. Once you are satisfied with the “look” click “Customize and Print Full Size”.
It brings you to the Customize and Resize screen. This is where the magic happens. Here you can fine-tune the design. You can change the size you need the stencil to be here. For example, if you are looking to burn on a 10” wide slab, you would resize the stencil to 9”. I suggest using a tape measure and carefully measuring the burnable area, or where you want the stencil to go. Rapid Resizer will automatically resize the stencil to equally go across all sheets of paper.

To get an accurately sized stencil, there are a few things you need to do:
Make sure the design is straight or if you the orientation to be different. Click on “Prepare your design to resize accurately”. This will bring up the below screen. Here you can rotate, mirror, and flip the design. I usually mirror the design so it will print in reverse and then heat transfer correctly.

Crop the design down. This means you remove all the extra space around the design. This will give you the most accurate size for the stencil. If you don’t it will size the entire design as is with extra white space. You can set it to automatically crop to the edges or crop to the shapes provided.

Printing: Once you have cropped the design to your liking, you are given options on how you want to print: e.g. how dark/light do you want the print? Experiment to find the setting you like the best. I usually use the “drawing setting” as it gives me the clearest outlines. Once you are satisfied click “Apply”.

You will be brought back to the previous screen. Here you can resize it to “Fit Page”.

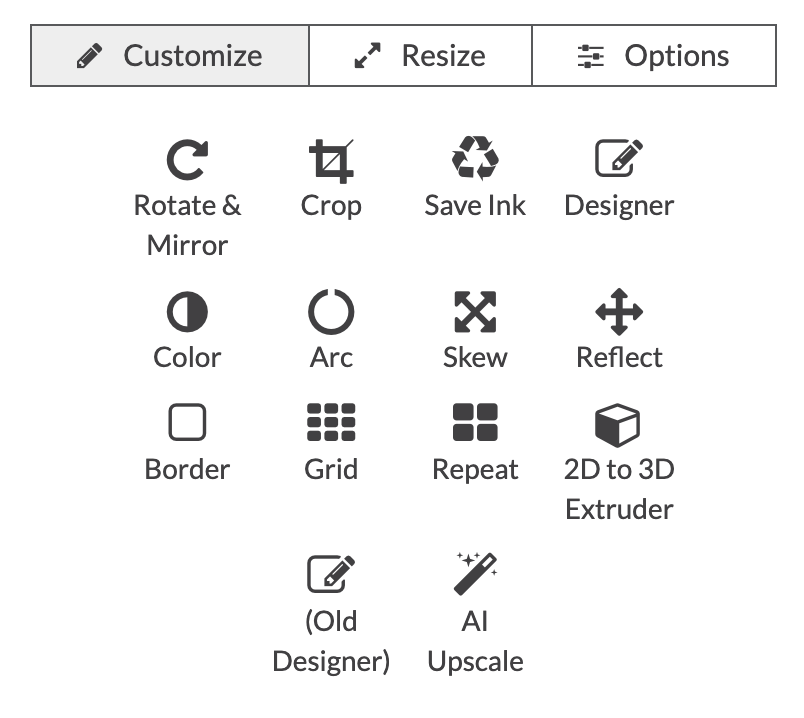
The customize screen gives you the below options to go back and tweak the design if needed. It also gives you the “designer” option.
If you click on Designer you will be brought to the “designer” page. Here you can tweak the design more if you like. You can add designs you have already saved in your account, add text, and even erase pieces of the design. Once you are satisfied you click “Print” to go back to the customize and resize screen.

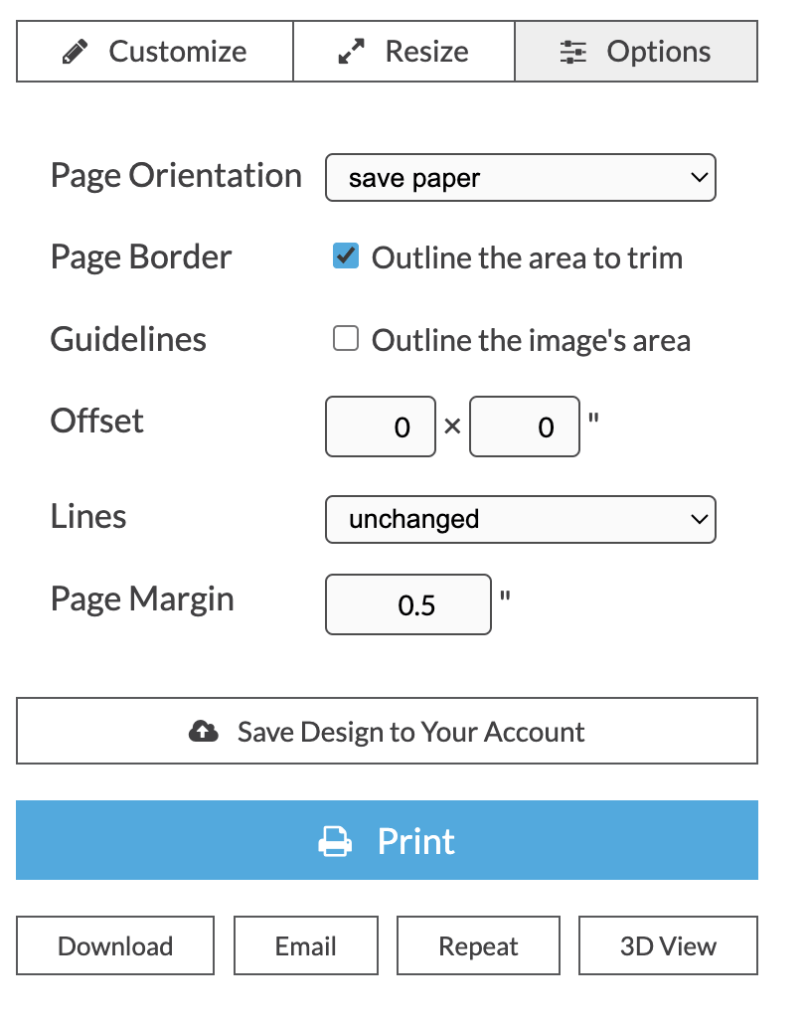
Once you are back on the “Customize and Resize” screen, there are a few more options you can use.
Under options, you can choose whether you want a dotted outline of the area to trim and page orientation. If the design is more than 1 page you also have the option of whether you want the pages to print the columns and row. This is to help organize the print for reassembling. Also from this screen, you can save the design to your cloud account (on the site), repeat the design if you want a repetitive design, and change the margin size.
Once you are satisfied you can click “Print”
1 Page Print:
2 Page Print:
Once the stencil prints out I use a heat transfer tool to transfer the stencil onto the wood.
This is only one way to transfer a pattern onto wood. I also use graphite paper and a pen or pencil or stylus, but I like the detailed transfer this gives me for most patterns. We hope that you find this helpful as this is something that I have found to be an invaluable tool in my daily workflow. Do you have a favorite tool that you use. Tag us @bz_furfur and, as always, stay unique.